The Idea:
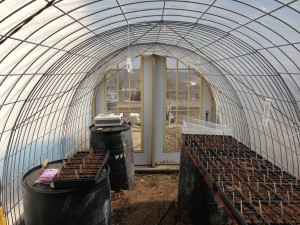
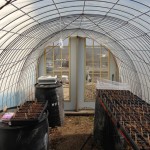
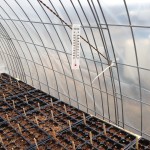
A look at the inside
We live in southeast-central Iowa, so winters are generally cold and unpredictable. Our idea was that if we had a small greenhouse where we could; 1) protect our seedlings from the cold frozen nights of early spring, and 2) maximize the sunny almost warm days, we could get a jump start on spring and save ourselves a ton of money since we wouldn’t have to buy expensive starter plants for our burgeoning food gardens.
Needless to say this came with its own set of challenges.
The first obstacle we encountered was cost. While the greenhouse kits we saw were attractive to look at, they seemed a bit chintzy and cheaply built and their price tags were not attractive to our shoestring budget. The more industrial greenhouses were of a much higher quality of course, but again their prices were far out of our reach, at least for now.
The second obstacle we knew we would have to tackle was weather. Our farm sits atop a hill where it seems the wind never stops blowing. Straight winds of 25mph are not uncommon, and gusts approach 40 or even 50+ during certain weather events. We planned on putting in some kind of wind block, but we still knew we needed something that would be strong enough to handle these violent and frequent blasts. The industrial model greenhouses were definitely up to the task, but again, that was a non-starter due to budget constraints and the pre-made-in-china-kits were no match for the winds.
One day this winter I was walking in our west lawn where our garden beds were quietly laying in repose. I noticed the cattle panels we had used for our beans and peas to climb on last year and I got an idea: Why not hoop cattle panels and link them together to make a frame, cover it with plastic, and voila! A greenhouse! I thought it over. Looped cattle panels would be strong enough to take a late spring snow, light enough to build with easily, cheap enough for our budget, and linked together they would provide an adaptable, potentially movable, perfect sized greenhouse for our operation.
Gathering materials.
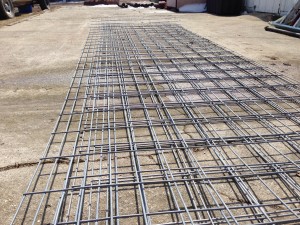
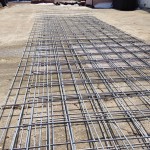
Panels
I knew I needed cattle panels. Luckily, there was a sale going on right when I needed them, and I managed to pick up the 52″ by 16′ panels for only $20 each. At first, my idea was that I would hoop together four panels for the frame, lay plastic over top of these, and then put another layer of panels on top to secure the plastic from those nasty winds. So that was four panels for the base frame, and four for the top layer. Eight total.
Then I needed the plastic. I first thought I would use regular 6 mil painters’ plastic for the covering. I did some quick research and found that there were companies where I could get actual greenhouse plastic at about the same cost. This greenhouse plastic also let more sunlight in, was stronger, and made to withstand weather better. So I ordered some from Greenhouse Megastore.
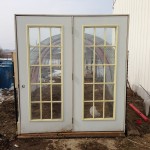
I needed something to put as ‘bookends’ to close the two ends of the greenhouse. Luckily, about 7 months ago I was doing a painting job where the home-owner was throwing away two sets of patio doors. At the time he had asked me if I had a use for them, and I, thinking I would use them to make some hot frames or something took them. They had been sitting behind the machine shed since, and now they were perfect for closing in the ends of the little greenhouse.
The other odds and ends I needed were not hard to find:
- Wire to cinch up the hoops
- Some re-bar stakes
- 4 T-posts to hold up the doors on the ends,
- some metal strapping,
- Screws
- Zip-ties
- Some planks and scrap lumber
The Building Process
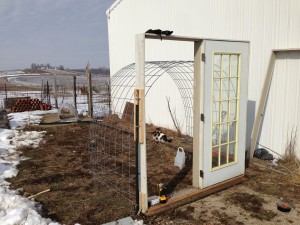
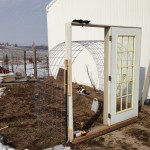
The beginning.
I began to build. I started by setting the east-side door. I stood it in place, on an old plank that I cut to fit. Then I drove the first 2 T-posts along the edges, plumbed it as best as I could, and attached the jambs to the t-posts with strapping. Then we began to add the hoops one at a time, securing them by driving re-bar stakes in the ground like tent stakes. We continued till we got to the other side, using a string line to stay as straight as we could, and zip-ties to fasten the panels together, then put the other door on using the same process as before. All this took just a couple of hours.
I then took some wire and ran a loop from the top to the side and twisted it to cinch up the hoops and make them stronger. I figured this would help it be secure from snow and wind.
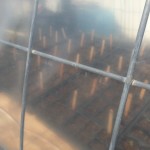
Next came the plastic. This proved to take longer than I thought because of one oversight. At each intersection in each of the panels, there was just a little bit of welding slag forming a sharp snag point for the plastic. Each of the intersections needed to be filed down smooth so the plastic wouldn’t tear. This took four hours, but preserving the plastic through the winds seemed worth the extra step.
The piece of plastic we bought was 18’x25′ so it needed cut to size before we put it over the hoops. Toni and I spread it out on the lawn, measured and cut it, and then carefully slipped it over the hoops.
I used a heavy section of plank to secure the plastic on one side, then I pulled it tight across, and did the same on the other side.
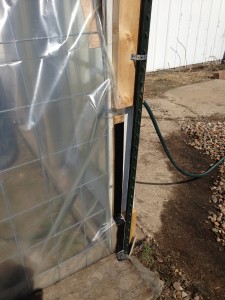
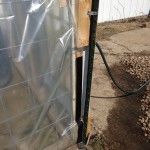
One finished corner
Staples and gorilla tape secured the plastic to the patio door jambs. It definitely was not as pretty, when finished, as the one in my head but it would do.
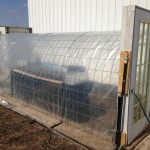
I was amazed at how warm it was getting inside immediately. I bought a thermometer to hang inside that records the high and low of a 24 hour period, and began to monitor how warm the days were and how cold the nights were.
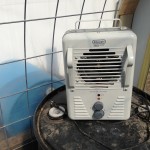
The first few days the high outside was in the mid thirties, with lows in the teens. The greenhouse was warming up very nicely during the day to about 80 degrees, but at night it was still getting just as cold as outside. I put five black barrels inside the greenhouse and filled two of them with water. In theory I hoped that these barrels would warm with the sun during the day and help maintain a warmer temp through the night. They took a while to work since I filled them with cold water, but they did help to even out the temperature some. However, it was still getting too cold in the greenhouse at night to keep seedlings alive. My next step was to put in a small space heater. I ran it for one night that was supposed to get down to 11 degrees, and I only was able to keep the inside of the greenhouse up to 14.
The days are warming up now, and we are seeing a little warmer temps in the greenhouse overnight. Still, because we don’t want to buy another space heater we are having to bring our eight trays of seedlings into the house each night to keep them from the frost. Hopefully temperatures will warm up some before our next planting day.
All in all, our greenhouse project has been a success. It has been a fun process, and we have learned a lot. Now we are just waiting to see how much we can make it produce!
If you would like detailed instructions on how to replicate this project, sign up for our email list or contact us directly!


Leave a Reply